
Landscape Lighting · October 26, 2026 · 8 min read
Outdoor Step Lights: Lighting Desert Stairs So Nobody Misses A Tread
Outdoor step lights should show the edge of every tread without glare. Where to mount them, which fixtures survive desert heat, and the mistakes to skip.

Outdoor step lights have one job: make the front edge of every tread readable at night without putting a bright dot in anyone's eyes. Most stair lighting we get called to fix fails at that second part, with fixtures aimed at the person walking instead of at the stone. On desert properties the problem gets worse, because grade changes are common, stairs are often built from dark flagstone or board formed concrete, and the surrounding landscape is kept dim on purpose. Good landscape lighting treats stairs as a safety element first and a design element second, and the two goals line up more often than people expect.
What Outdoor Step Lights Need To Show
A person climbing stairs at night reads two things: where the tread ends and how tall the next riser is. If the nosing is lit and the riser below it falls into shadow, the eye gets that information instantly. If the whole stair is washed evenly from above, the edges flatten out and people slow down, look down and feel for the step with a foot.
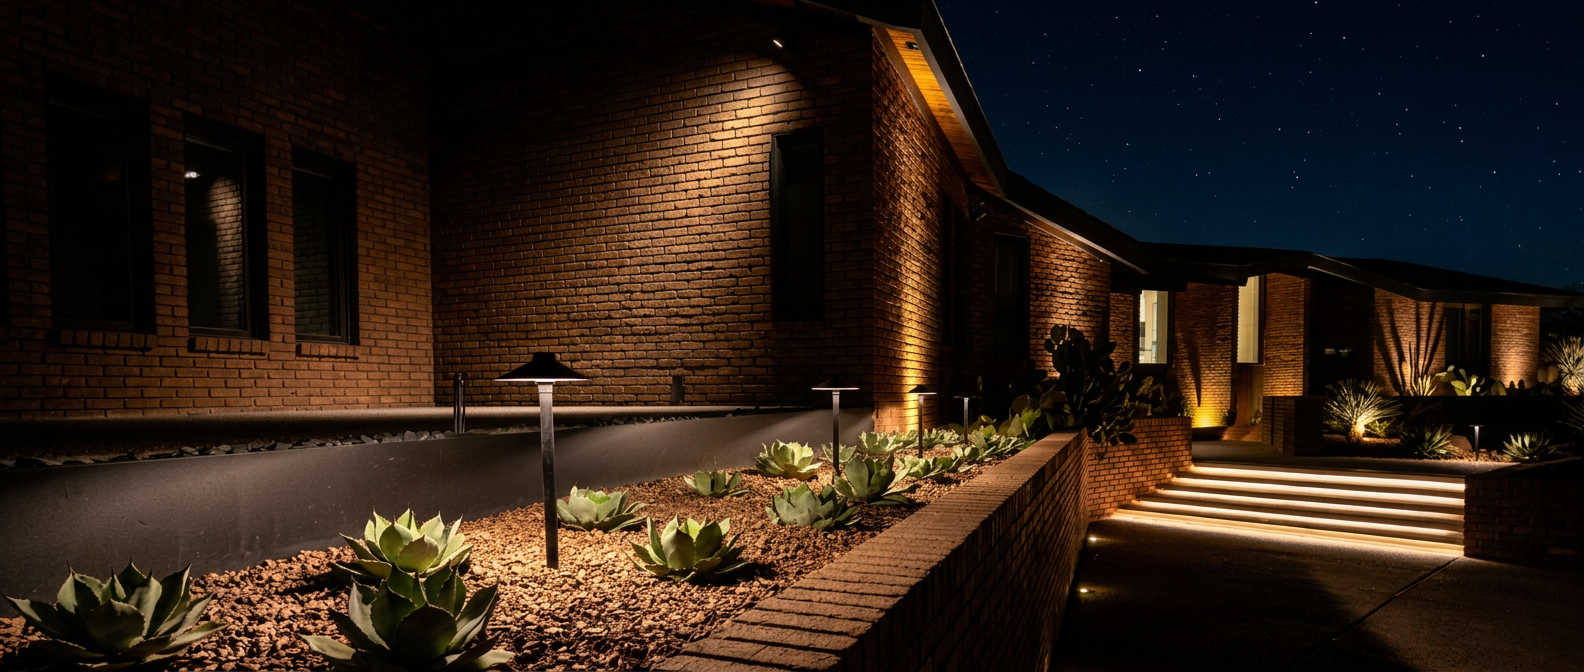
That is why the strongest stair lighting comes from low, shielded sources that throw light across the tread surface. The light should land on stone, not on faces. When you stand at the bottom of a well lit stair and look up, you should see a series of clean lit bands and very few visible lamps.
Riser Mounted, Wall Mounted, Or Path Lit
Riser mounted fixtures sit recessed into the vertical face of a step and wash the tread directly below. They give the cleanest result on concrete and block stairs, but they have to be planned before the stair is poured or laid, because the housing needs a cored or formed opening and a protected cable route behind it. Retrofitting them into finished flagstone usually means removing and resetting stone.
Wall mounted step lights go into a cheek wall or retaining wall beside the stair, typically every second or third tread. They suit wide stairs with a side wall already in place and are easier to service. Where there is no wall at all, low path fixtures set beside the stair in the planting can do the job, as long as the hood is deep enough that the lamp is hidden from someone walking down.
- Riser fixtures: best visual result, must be planned before the stair is built.
- Cheek wall fixtures: easy to service, need a solid wall beside the treads.
- Shielded path fixtures: the retrofit option for open stairs in planting beds.
Spacing And Height Rules We Work From
On a residential stair, one riser fixture every second step is usually enough when the treads are a normal depth, around 12 to 16 inches. Deep landscape steps with long treads, the kind that run three or four feet between risers, often need a fixture at every riser or a pair of side lights per tread, because the light fades before it reaches the next edge.
Wall mounted fixtures are typically set so the bottom of the housing sits around 12 to 18 inches above the tread nosing. Mount them much higher and the beam spreads across the stair and into the eyes of anyone coming down. Mount them too low and splashback from monsoon rain and dust buries the lens. We confirm the final height on site with a temporary lamp after dark before any wall gets cored.
Glare Is The Most Common Stair Lighting Mistake
A step light with an exposed lamp facing outward is a hazard dressed as a safety feature. The bright point pulls the pupil closed, and the treads around it look darker than they would with no light at all. This happens most often with cheap louvered fixtures where the lamp sits flush with the faceplate.
Look for fixtures with a deep eyebrow hood or a recessed, downward facing optic, and keep the output modest. A stair does not need much light: a few hundred lumens across an entire flight is often plenty when the surrounding yard is dark. Warm color helps too, and the color temperature guide explains why 2700K tends to sit better against desert stone than a cooler white.
- Choose hooded or recessed downlight optics, never an exposed lamp.
- Keep output low enough that the treads read, not glow.
- Check every fixture from the top of the stair, looking down, at night.
Desert Materials Change The Approach
Dark flagstone and basalt absorb light, so stairs built from them need either a little more output or a tighter spacing than pale travertine or limestone. Polished or sealed surfaces do the opposite and can mirror a fixture back at the viewer, so on glossy pavers we aim the light more steeply down and keep it further back from the nosing.
Board formed concrete and corten steel risers are common in contemporary desert builds in Scottsdale and the foothills. Both look strong grazed from the side, and both make riser fixtures hard to add later. If a stair is being formed in concrete, ask the builder to set the fixture boxes and conduit in the forms. That one coordination step saves a lot of cutting.
Heat, Dust And Hard Water On Step Fixtures
Stair fixtures live close to the ground and often in full sun, so a black faceplate on a south facing wall can get hot enough in July to shorten the life of cheap drivers. We favor solid brass or marine grade housings with integrated LED modules rated for high ambient temperatures, and we avoid painted aluminum faceplates that chalk and fade within a few summers.
Low mounted lenses also collect dust from monsoon storms and mineral spots from irrigation overspray. Adjusting a sprinkler head so it stops hitting a cheek wall does more for a step light than any cleaning schedule. Plan for a gentle lens wipe with a mild vinegar solution once or twice a year on properties with hard water.
Wiring Step Lights Into The Larger System
Step lights usually run on the same low voltage system as the rest of the landscape, fed from a transformer through a dedicated run. Keeping stairs on their own circuit or zone is worth it: you can leave them on all night for safety while the decorative uplights shut off at a curfew, which also helps on lots where HOA or dark sky rules limit late night lighting. Confirm the current municipal and HOA rules for your property before settling on a schedule.
Riser and wall fixtures need cable routed behind the stone, not across the tread or through a joint where it will get cut during a repair. On hillside lots in Cave Creek and similar terrain, long stair runs can also mean noticeable voltage drop at the far end, so the cable size and transformer tap get checked with a meter at the last fixture, not assumed from the drawing.
- Put stairs on their own zone so they can stay on after decorative lights go off.
- Route cable behind stone and inside conduit wherever it crosses hardscape.
- Measure voltage at the last fixture on long or hillside runs.
Planning Stair Lighting With Cashscapes
We look at stairs in daylight to understand the materials and geometry, then come back after dark to see how people move through the property and where the shadows fall. That night visit is where most spacing and height decisions get made. You can see how stair lighting fits into finished properties in our project gallery.
If you are building new stairs or living with a flight that feels risky after sunset, send us a note with a few photos and the stair material. We will tell you whether riser, wall or path fixtures make sense and what needs to happen before the stone goes down.
Frequently Asked Questions
Planning A Project?
We walk the property in daylight, come back after dark, and design the system around what your home actually needs.
Continue Reading
Landscape Lighting · 9 min read
2700K Or 3000K: Choosing Landscape Lighting Color Temperature In The Desert
Planning & Design · 9 min read